In this post, I am going to cover Amazon EC2 (Elastic Compute Cloud), which is a computing service from AWS.
The EC2 is a computing service that provides scalable computing capacity and eliminates the investment in hardware up-front, so the applications can be developed and deployed faster. Virtual machines on AWS EC2, are called instances. Here in this blog, we are going to covers how to launch a Windows-based instance.
This post will cover:
What Is Amazon EC2?

Amazon EC2 is a web service that provides secure, resizable compute capacity in the cloud to the users. The EC2 allows us to configure the capacity, it also provides complete control on all over your computing resources. An AWS user can increase or decrease instance capacity as per need by using the Amazon EC2 web interface or an application programming interface (API). A developer can code an application to scale up and down instances automatically with AWS Auto Scaling. A user can also define an autoscaling policy and group to manage multiple instances.
Why We Use Amazon EC2?
The organizations have to invest a huge amount in buying hardware components and to manage them is more hectic than buying so the Amazon EC2 eliminates the investment in hardware upfront, so you can develop and deploy applications faster. Using Amazon EC2 you can launch as many or as few virtual servers as per your need, manage storage, configure networking and security. Amazon EC2 enables you to scale up or down to handle changes in requirements or spikes in popularity, reducing your need to forecast traffic.
How Amazon EC2 Works?
A User Can choose EC2 from the AWS Services dashboard and ‘launch instance’ in the EC2 console. The User can also select either an Amazon Machine Image (AMI) template or create an AMI containing an operating system, application programs, and configuration settings. The AMI is then uploaded to the Amazon S3 and registered with Amazon EC2, creating an AMI identifier, and then the user can increase or decrease the instance capacity as per need. Amazon CloudWatch allows us to monitors the EC2 Instances and Amazon cloud applications and resources, it allows users to set alarms, view graphs, and get statistics for AWS data and AWS Marketplace.

Features Of Amazon EC2
- Reliable: Amazon EC2 offers a highly reliable environment where the replacement of instances is rapidly possible.
- Secure: Amazon Virtual Private Cloud where Amazon EC2 works and provides a secured and robust network to resources.
- Flexible tools: Amazon EC2 provides the tools for developers and system administrators to build failure applications and isolate themselves from common failure situations.
- Inexpensive: Amazon EC2 wants us to pay only for the resources that we use on an hourly basis. It includes multiple purchase plans such as On-Demand Instances, Reserved Instances, Spot Instances, etc. which we can choose as per our need.
Use Cases Of Amazon EC2
- Hosting environments: Mostly Amazon EC2 uses for hosting a website and application on the cloud. The best part of Amazon EC2 is that it provides a Dynamic and Scalable environment that its compute capacity can grow as per the need of the application. Companies like Netflix, Reddit are the best proof of the EC2 hosting success.
- Backup and disaster recovery: Companies hold Amazon EC2 as a medium for performing disaster recovery for both active and passive environments. Amazon EC2 turns quickly in case of an emergency that means businesses have access to the fastest failover with minimal downtime of their application.
- High-performance computing: The Amazon EC2 provides virtualized servers that provide high-performance networking and high compute power. An organization like NASA and Pfizer employs the use of high-performance computing using the Amazon EC2 Instance.
- Development and test environment: Amazon EC2 is scalable in nature, so now the organization has the ability to create and deploy large scale testing and development environment with unprecedented ease. Amazon EC2 eliminates the investments in hardware and also provides a scalable solution
- Banking and financial sector: These are the sectors where they demand maximum scalability and security, both are provided by Amazon EC2. Amazon cloud builds trust by providing highly secure services. Retail and commercial banks, insurance providers, and major payment platforms rely on AWS.
Steps To Create Amazon Windows EC2 Instance
Note: If you don’t have an AWS account, check our blog on how to create AWS Free Tier Account
Step 1: Log in to your AWS account and go to the EC2 dashboard to launch a new instance

Step 2: Select Windows Server 2019 Base AMI. You can also select other AMI as per your need but here we launching a Windows Server, so we have to select the Windows Server 2019 Base AMI.

Step 3: Select the t2.micro instance type, if you want you may select another instance type but they are chargeable so we choose the t2.micro instance type which is eligible for the free tier and limited resources. Now click on Next: Configure Instance Details.

Step 4: In the Configure Instance Details step, let everything be the default. You can configure some options like Network or Subnet as per need. Now click on Next: Add Storage.

Step 5: In the Add Storage step, let root volume set to the default of 30Gib, You can also add volumes to your instance as per your need. Here I let everything be the default for now. Now click on Next: Add Tags.

Step 6: In the Add Tags step you can add tags to an instance, here tags help you to enable categorize AWS resources in different ways, for example, by owner, environment, or purpose. For example, you could define a set of tags for your account’s Amazon EC2 instances that help you track each instance’s owner and stack level. Now click on Next: Configure Security Group.

Step 7: In the Configure Security Group step we add the security group to an instance you may select your existing security group or create a new one. The security group acts like a firewall allowing you to choose which protocols and ports are open to computers over the internet. The RDP(Remote Desktop Protocol) protocol is used to connect to the Windows instance now click on Review and Launch.

Step 8: In this Review Instance Launch step we are reviewing AMI, storage, tags, security groups that we have selected. Here If we want to make any changes again in launching the instance then we can do it. Now click on Launch

Step 9: After reviewing the Instance we have to create a New Key-pair, also you can select the existing one but I recommend you to create a new key pair. For creating a new key pair Provide the Name of The Key-pair, and Download it and keep it somewhere safe because it helps us to decrypt the password of Windows AMI. Now Launch the instance.
Note: You must have to download the key-pair at this step only otherwise you are not able to download it after the launch of the instance. This key-pair is used to decrypt the password for RDP, use to connect through CLI, and for file transfer software.

Step 10: Here we have successfully created an Amazon Windows Instance.

Steps To Connect Amazon Windows EC2 Instance
Step 1: Firstly we have to select the Windows instance From the Running Instance of the EC2 dashboard and click on Connect.

Step 2: Here we have to select the RDP (Remote desktop protocol) Client and then Download the RDP File and save it somewhere safe and then we need a password to access the RDP file so click on Get Password.

Step 3: At this step of launching, we have to upload the Key-pair that we have downloaded at the final step of launching the Instance so click on Browse and then select the key and click on Decrypt Password. This provides us a usable password.

Step 4: After submitting the Key-pair here the Password is Generated, copy and save it somewhere safe.

Step 5: Now open the Remote Desktop File from downloads for launching the Windows instance. If your local computer is a Mac, you will need to download “Microsoft Remote Desktop” from the App Store to be able to open your RDP file.

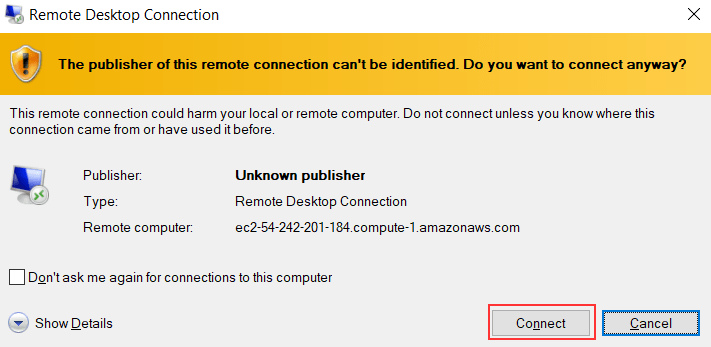
Step 6: After opening the RDP file click on Connect to launch the Window instance.
Note: Windows has the Remote Desktop Connection Application pre-installed; so for other OS like mac you need to download the Microsoft Remote Desktop app from the Mac App Store.
Step 7: Here we have to provide the credentials for accessing the Instance so we have to Enter the Password That we copied at step 4 and click on Ok.

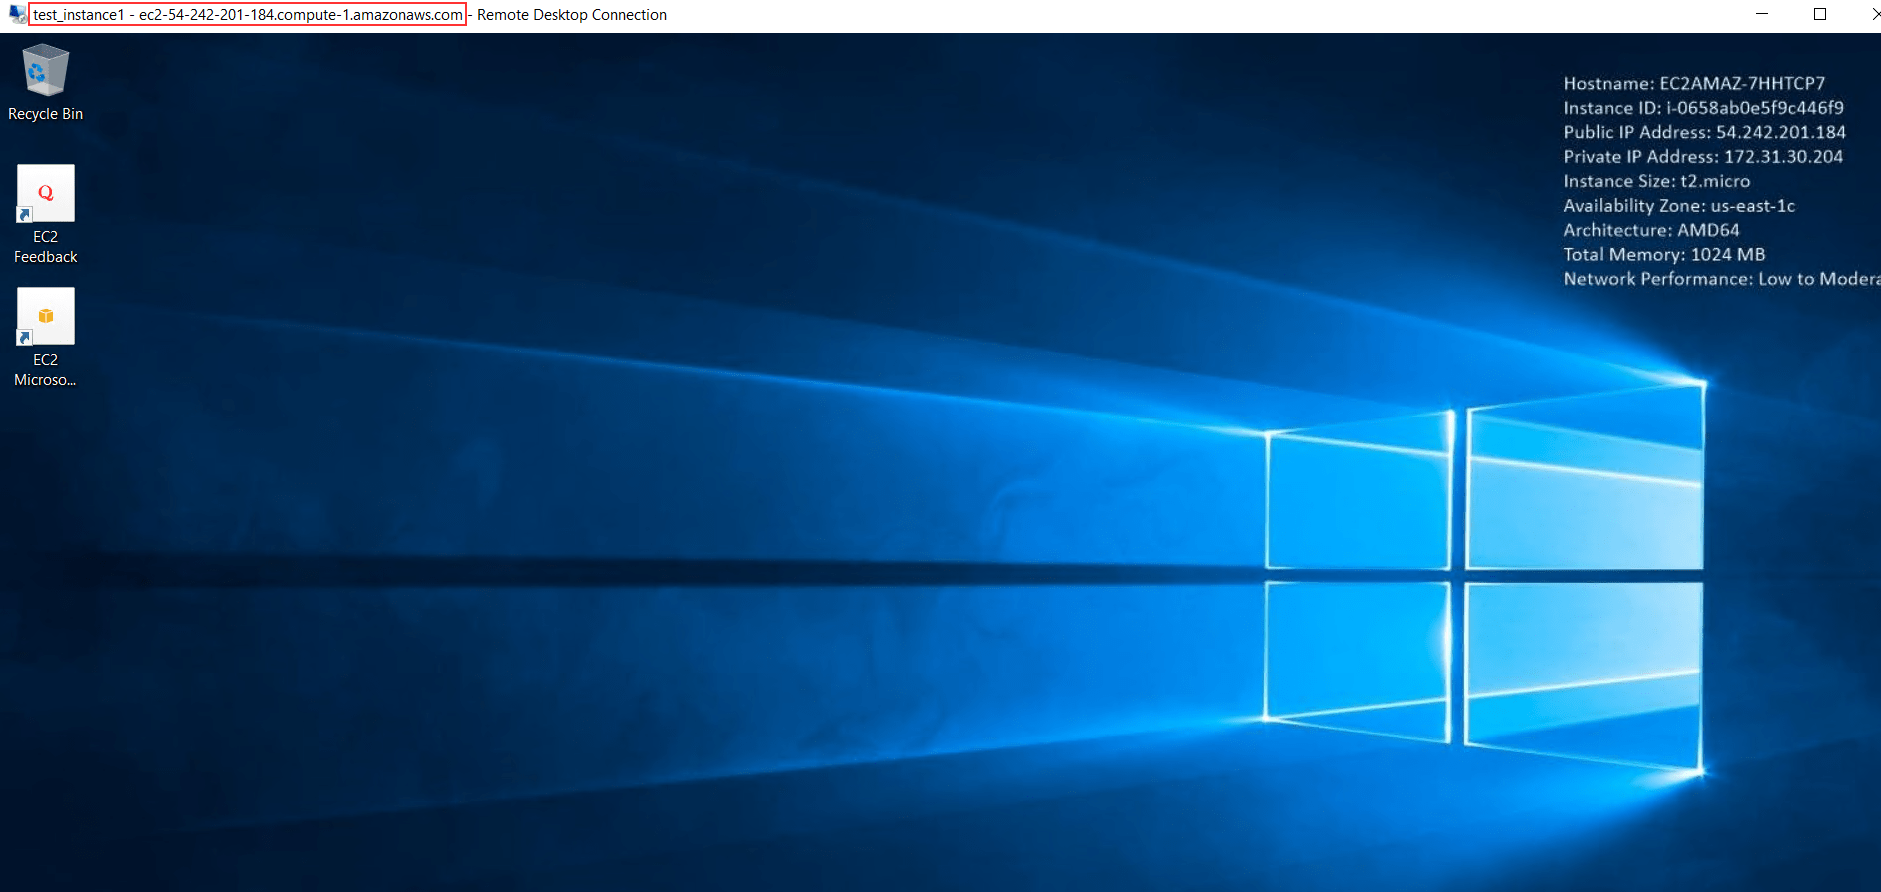
Step 8: So we have successfully connected to an Amazon Windows Instance, here we perform all our operations and task that we are performing on the normal windows operating system.
That’s all our Amazon Windows EC2 instance is up and running. To know more about AWS please check our references section.
Related Links/References
- AWS Free Tier Limits
- AWS Free Tier Account Details
- Overview of Amazon Web Services & Concepts
- How to create a free tier account in AWS
- AWS Certified Solutions Architect Associate SAA-CO2
- Storage – Amazon Elastic Compute Cloud – AWS Documentation
- Amazon Elastic File System User guide
- AWS Management Console Walkthrough
Next Task For You
Begin your journey towards becoming a Certified AWS Solution Architect Associate by joining our FREE Informative Class on Amazon AWS Solution Architect Certification For Beginners & Q/A by clicking on the below image.

The post Create And Connect To Amazon AWS Windows EC2 Instance appeared first on Cloud Training Program.


